Viser opslag med etiketten Oriflame. Vis alle opslag

16. september 2011

Nail Art Tutorial - Pink & black french manicure

Heey :D

Jeg syntes lige jeg ville lave noget nail art.. så hvorfor ikke lave en tutorial her på siden (:

Det er et French Manicure inspireret look, med pink, sort og en smule glitter !!!

Dette er et rigtig fedt look til når man skal i byen og feste, eller bare på shopping eller hygge med veninderne. 

ENJOY!!! (:

Hello (:

I was in the mood to do some nail art.. so why not just make it in to a tutorial here on the blog :D

This is a French Manicure inspired look, with pink, black and a bit of glitter !!

This is a really cool look, especially for party nights, or just a nice shopping with tha' girlfriends!

ENJOY!!


Hvad jeg brugte: Sally Hansen Maximum Growth Nail treatment / Oriflame base & top coat Claudia 'Just Black' no. 157 /GOSH 'Magic Star'  nr. 562 / Hot looks 'Siren' nr. 5 / Depend white art liner Depend black Art liner
What i used ^^  

1.
Base coat: Husk altid at bruge en base coat eller nail treatment før du påføre neglelak. Dette vil forhindre og forebygge misfarvning af dine negle og gøre sådan så din neglelak holder i længere tid.
Base Coat: remember always put on a layer of base coat or nail treatment before applying any kinds of nail polish. This will help prevent stains on your nails, and will make your nail polish last longer!

2.
Tag nu tape på 2/3 af din negl, så 1/3 er fri. Hvis du er rigtig god og lige med dine lakker, behøves dette ikke.
Now tape 2/3 of your nail, so 1/3 is free. If you are really good and straight with your varnish, you do not need this


3.
Nu skal du bare tage din neglelak på tippen af din negl hvor tapen sider. 
Now just put on nail polish on the tip og the nail, where the tape is.


4.
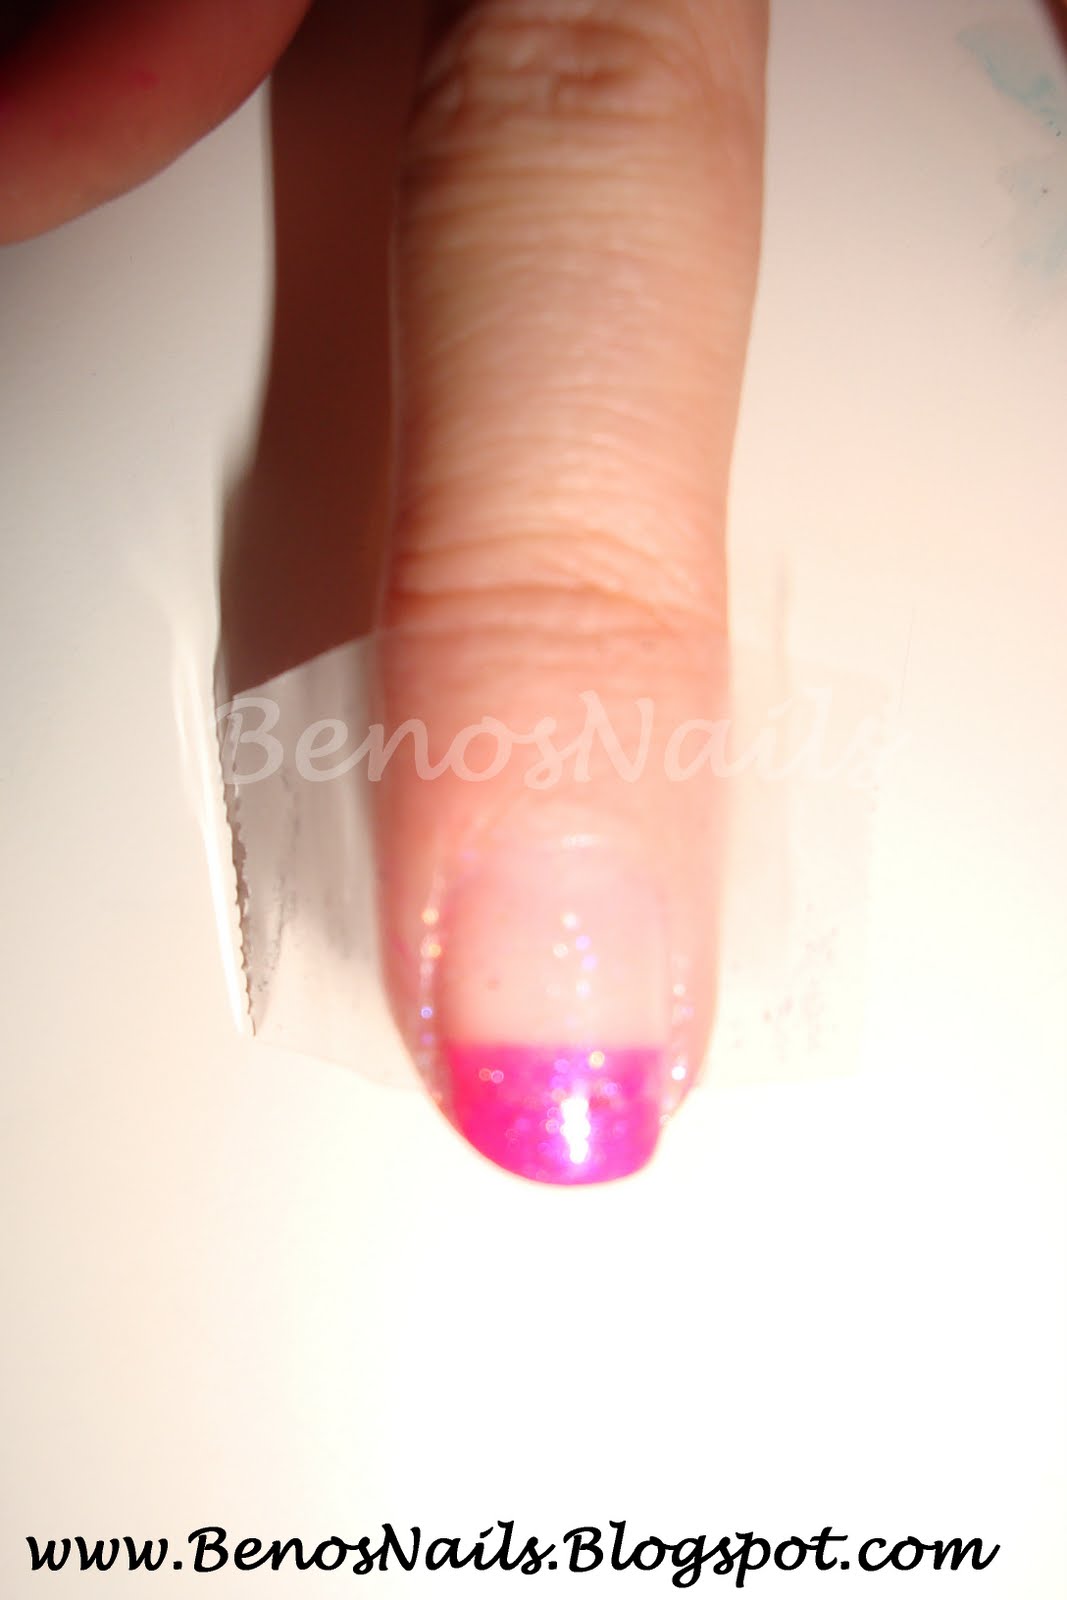
Tag tapen af, ligeså snart du har påført lakken .
Take the tape of as soon as you have taken on your varnish.


Tag nu din glitter lak og læg den ud over hele neglen.
Now take your glitter varnish, and place it on the entire nail.

5.
Lig nu tape på 1/3 af den pink tip, så 2/3 af neglen er fri.
Now put the tape on 1/3 on the pink tip, so 2/3 of the nail is free.

6.
Lig nu sort negelak over det pinke.
Now place the black varnish on top of the pink.
7.
Og igen, tag tapen af så snart du har taget lakken på.
And again, Take of rhe tape, as soon you have put on your varnish.


8.
Tag nu din hvide art liner og lav streger. Men kun på den sorte del. 
Now take your white liner and make stripes. But only on the black part,

 9.
Tag nu en sort art liner (eller dotting tool, tandstik o.s.v) og lav prikker langs den pinke linje.
Now take your black art liner (or dotting tool, tooth pick etc.) and create dots along the pink line.

10.
Nu skal der bare en topcoat på, så designet holder i længere tid! :D
Now just put on a topcoat to seal the design! :D


Tak fordi i kiggede med (:..

Thanks for watching :D

Take (Nail) Care

7. september 2011

Nail Art Tutorial - Neon Clown Suit

Hey folks :D
Her kommer min starter :D..  
En neon Nail Art Tutorial der hedder 'Neon Klovne Dragt'.
Håber i kan lide den (:


Hello guys !
Here is something to start with :D
A Neon Nail Art Tutorial. It is called ''Neon Clovn Suit''
I hope you like it!


Det jeg brugte: Depend nr.34 /Depend nr. 35 /Dorothy L. nail art pen & brush white/Dorothy L. Nail art pen & brush black/Sally Hansen maximum growth/Oriflame Base and top coat.
What i used: ^^

1.
Lig en Base coat eller nail treatment før du begynder på at ligge neglelak. Dette vil beskytte dine negle mod misfarvning, og får neglelakken til at holde længere.
Put on a base coat or nail treatment before you start putting on nail polish. This will protect your nails against stains from the polishes and makes the polish last longer.
2.
Lig nu den første farve. Med denne Depend skal man ligge 2 tynde lag, før  neglen er dækket.
Now put on the base color. With this Depend color i have used here, you have to put on 2 layers, so it is not seethrough.
3.
Lig nu den anden farve, men kun på den ene halvdel af neglen.
Now put on the second color, but only on the half side of the nail.
4.
Tag nu en hvid 2 way pen og lav prikker ned gennem midten af neglen, hvor de to farve mødes.  PS. hvis du ikke har en 2 way pen, kan du bruge en dotting tool, tandstikker, et nåle hovede, en hårnål o.s.v - andre ting med små dutter for enden :D
Now grab a white 2 way pen and make som dots down along the middle, where he two colors meet. BTW if you don't have any 2 way pen, you can just use a dotting tool, needle head, a bobby pin etc. - just things with small dots in the end will do.
5.
Tag nu din sorte 2 way pen og lav en prik inde i midten af de hvide prikker. HUSK at hvis du ikke har en 2 way pen, kan du godt bruge et dotting tool, tandstik, hårnål, nålehovede o.s.v - eller andre ting med små dutter for enden. 
Now take the black 2 way pen and make a dot right in the middle of the white ones. BTW if you don't have any 2 way pen, you can just use a dotting tool, needle head, a bobby pin etc. - just things with small dots in the end will do.
6.
Så skal der bare en topcoat på og wollah!!.. 
So now you only need to put on a top coat and wollah !!.. 


Tak fordi du kiggede med :D..
Thanks for wathcing! :D

Take (Nail) Care!!
Related Posts Plugin for WordPress, Blogger...